Join 1,000s of professionals who are building real-world skills for better forecasts with Microsoft Excel.
Issue #33 - Boosted Decision Trees Part 2:
The Magic of Weighting
This Week’s Tutorial
If you're new to this tutorial series, be sure to check out Part 1 here.
Here's a summary of how the AdaBoost algorithm works:
Use very simple models known as weak learners.
Combine these models into an ensemble.
New models focus on previous errors.
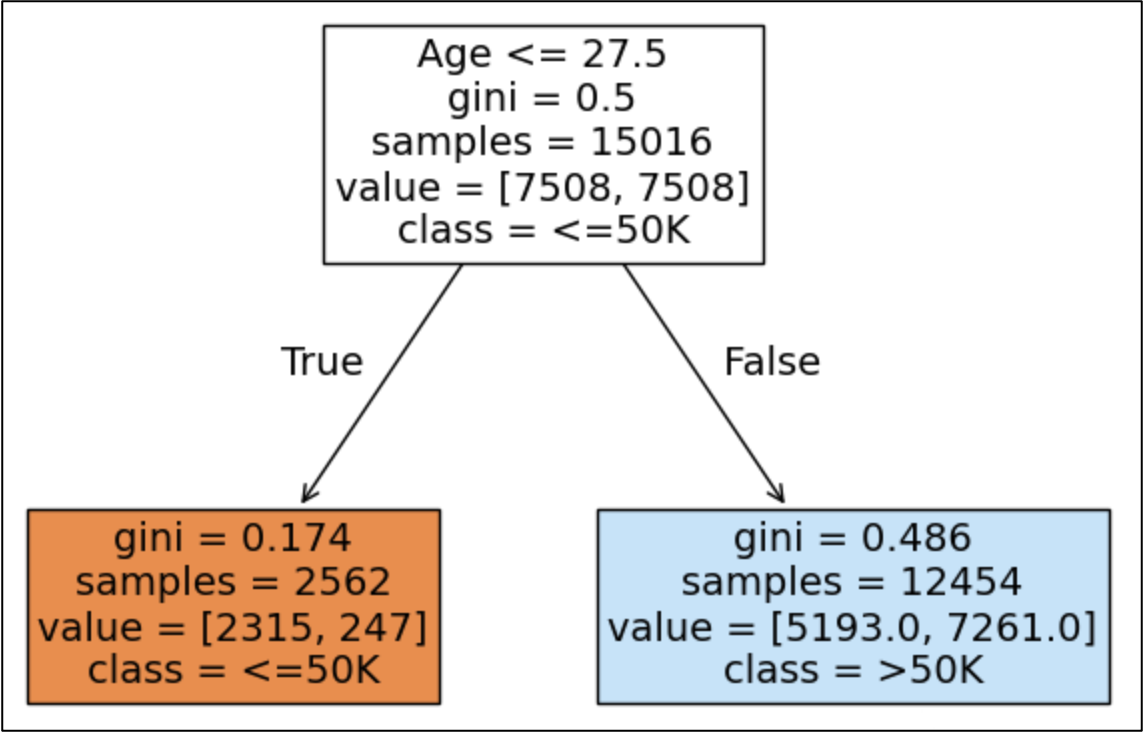
In the case of the AdaBoost algorithm, the weak learners are the simplest decision trees possible - decision stumps. Here's an example from Part 1:
As humans, we can intuitively understand the idea that each additional decision stump focuses on correcting the errors of the previous decision stump in the AdaBoost ensemble.
However, computers don't understand intuition - even in this age of AI.
So, AdaBoost uses a repeatable process of weighting the data to ensure that new decision stumps focus on correcting errors.
This weighting process is the magic that makes AdaBoost work so well as a predictive ensemble.
To keep things simple in this tutorial series, we'll consider the classic version of AdaBoost that only supports binary classification with outcomes of interest like:
True/False
Approve/Deny
Legitimate/Fraudulent
Etc.
The Initial Weights
When you first provide the AdaBoost algorithm a training dataset, it needs to create the initial set of weights. Think of weights as being like a score for each row of the training data.
For example, the adult_train.csv dataset used in this tutorial series has 15,016 rows.
AdaBoost will create a score for each row and will update these scores after each new decision stump is added to the ensemble.
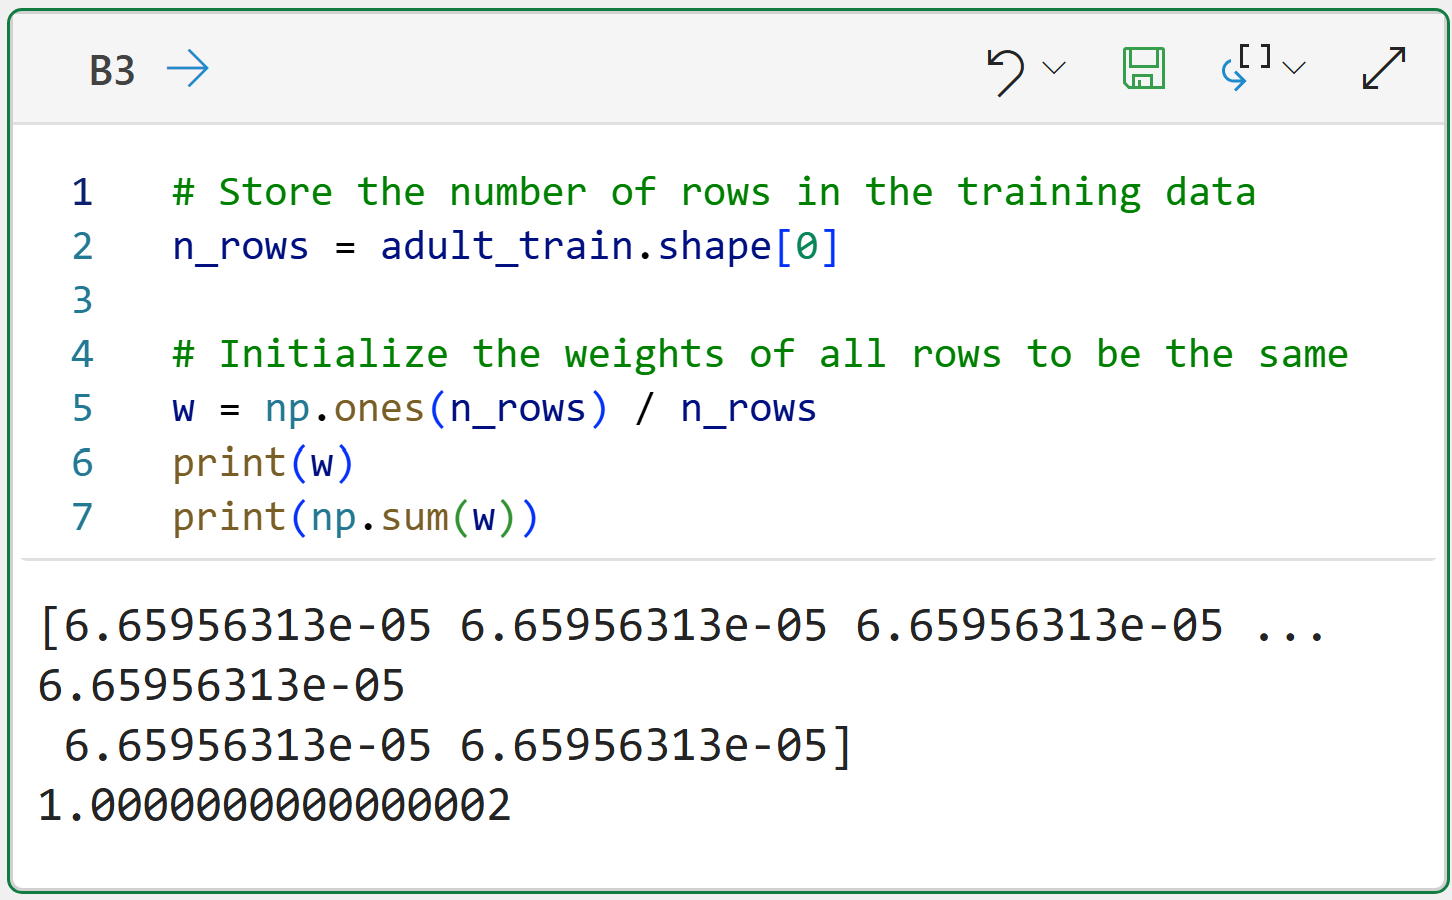
However, at the start, there are no decision stumps yet. That means AdaBoost must initialize the weights to all be equal. The following code demonstrates this using Jupyter Notebook and Python in Excel:
NOTE - As the code between Jupyter Notebooks and Python in Excel is the same, I will only show Jupyter going forward in this tutorial.
The output in the code above shows the following:
The variable w holds 15,016 weights.
The initial weights are all the same.
Summing the weights equals 1.
If you're not familiar, the ones() method comes from the numpy library and creates an array (think of this like a list) of size n_rows populated with ones.
Ensuring that the sum of all the weights is 1 is called normalization. The AdaBoost algorithm ensures that weights are normalized after each new decision stump is added to the ensemble.
Weighting Errors
With the initial weights in place, AdaBoost trains the first decision stump.
I will cover the code for training decision stumps in the next tutorial. For now, it's important to understand the weighting process.
Given that AdaBoost focuses on correcting errors (i.e., incorrect predictions), the weighting process needs to track which predictions were wrong:
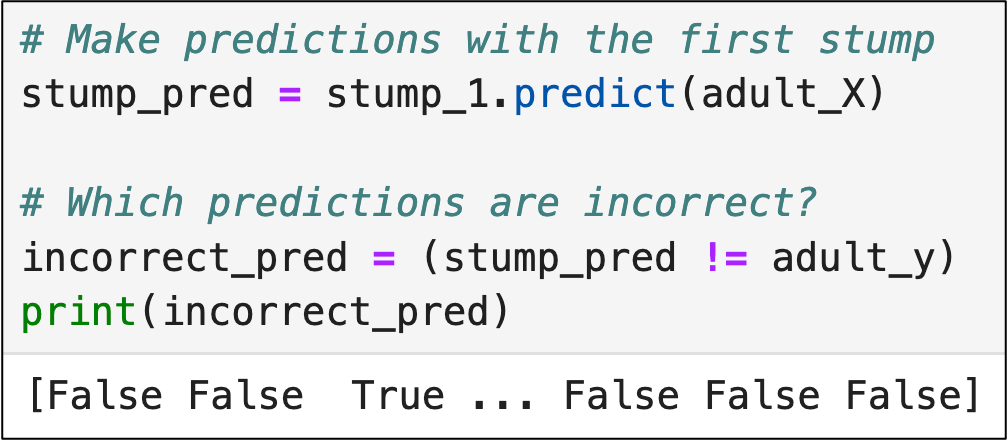
The code above checks the predictions of the first decision stump (i.e., stump_pred) against the actual label values of the training data (i.e., adult_y).
As a result of the above code, the incorrect_pred variable has a value of True when a prediction is incorrect and a value of False when the prediction is correct.
With the incorrect predictions identified, the next step is to weight the errors.
The key to understanding the following code is that Python will automatically treat False values as zeroes and True values as ones:
The code above is actually doing two things:
Multiplying the weight of each row (i.e., w) by whether or not the decision stump made an incorrect prediction for that row (incorrect_pred).
Summing all these multiplied weights using np.sum().
Here's some of the magic of AdaBoost in action.
Because correct predictions are False, and False is treated as 0, the weights for correct predictions become 0 due to the multiplication and do not increase the weighted error.
Next, the weighted error is normalized:
Weighting the Weak Learner
The AdaBoost algorithm is smart - it knows that some decision stumps are going to be better (i.e., more accurate) than others. So, AdaBoost calculates and stores a score for each learner, known as alpha.
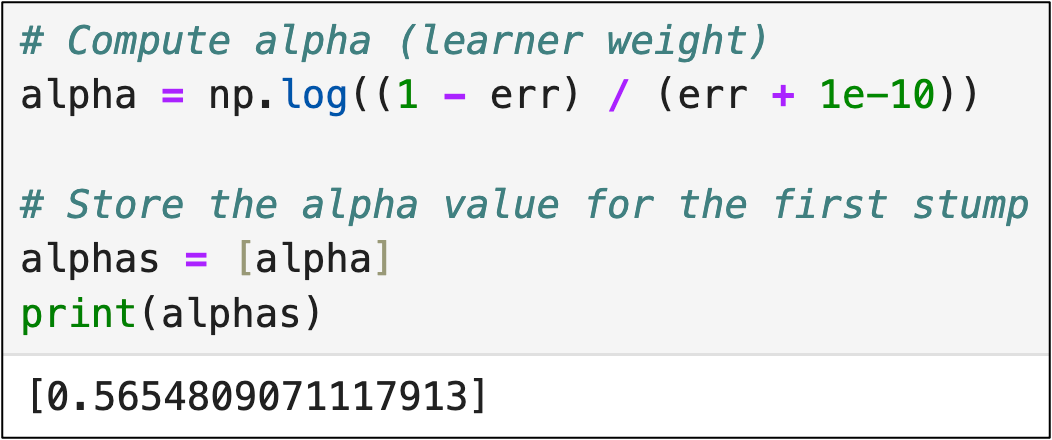
Technically, alpha is another kind of weight - a weight for each weak learner in the ensemble. Here's the code to calculate alpha:
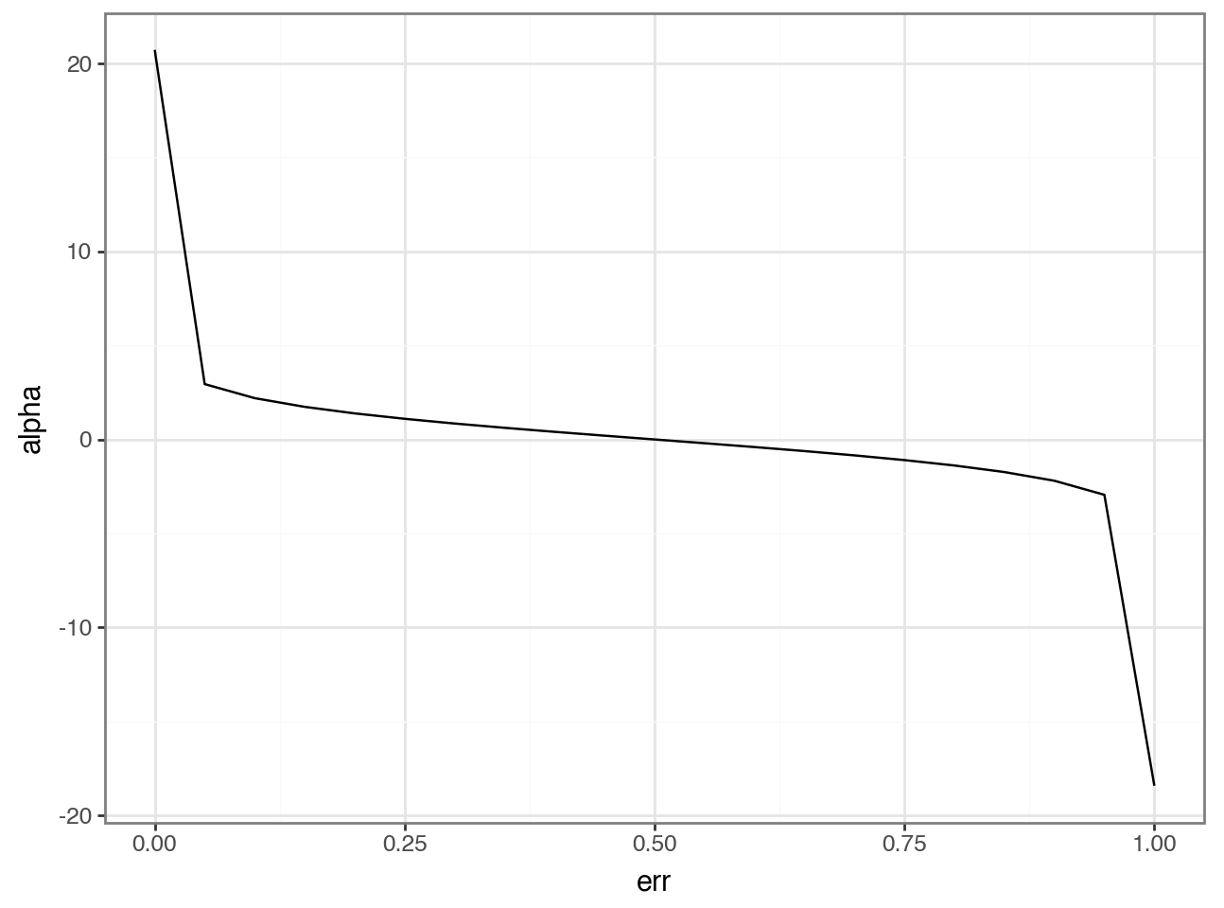
I'll spare you explaining the math of the above code in favor of a more intuitive way to understand what's going on - plotting the values of alpha for various values of err:
Here's the intuition of the math as illustrated in the visual above:
Weak learners with weighted errors below 0.5 are "good" and have positive alpha scores.
Weak learners with weighted errors above 0.5 are "bad" and have negative alpha values.
As you will see in a later tutorial, alpha is used to combine the weak learners to make predictions. "Bad" learners will contribute less to the ensemble's prediction compared to "good" learners.
Updating Weights for the Next Weak Learner
With the first weak learner (i.e., decision stump) weighted, AdaBoost now updates the training data weights for the next decision stump to be added to the ensemble.
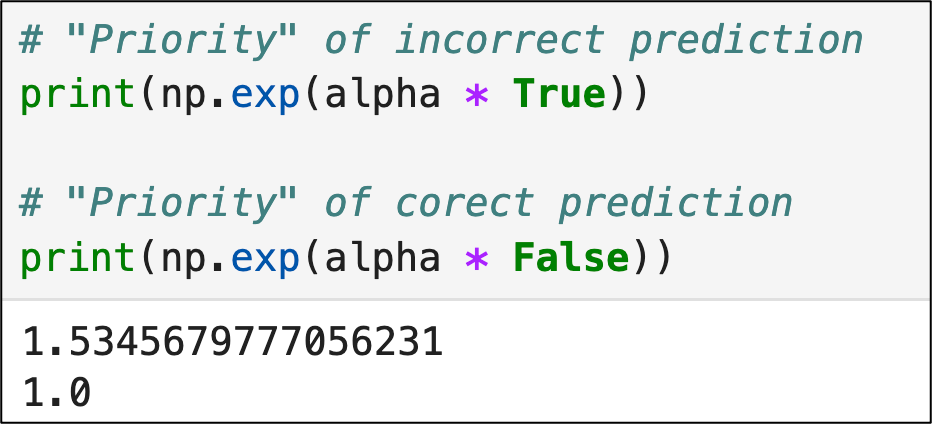
The weight update logic needs a calculation that prioritizes incorrect predictions vs. correct predictions. In other words, the weighting should be higher for incorrect predictions and lower for correct predictions.
AdaBoost uses a calculation based on Euler's number via the exp() function from the numpy library. The following code demonstrates the intuition:
AdaBoost multiplies each of the training data weights by the "priority" calculation, thereby increasing the weights of training data rows with incorrect predictions:
Take a look at the first 3 values in the output above:
5.22138680e-05
5.22138680e-05
9.19117647e-05
The first two values correspond to correct predictions from the first decision stump and the last value corresponds to an incorrect prediction.
Voila!
You now know how AdaBoost gets each weak learner to concentrate on the mistakes of the previous weak learner.
Also known as the "magic" of AdaBoost. 🤣
This Week’s Book
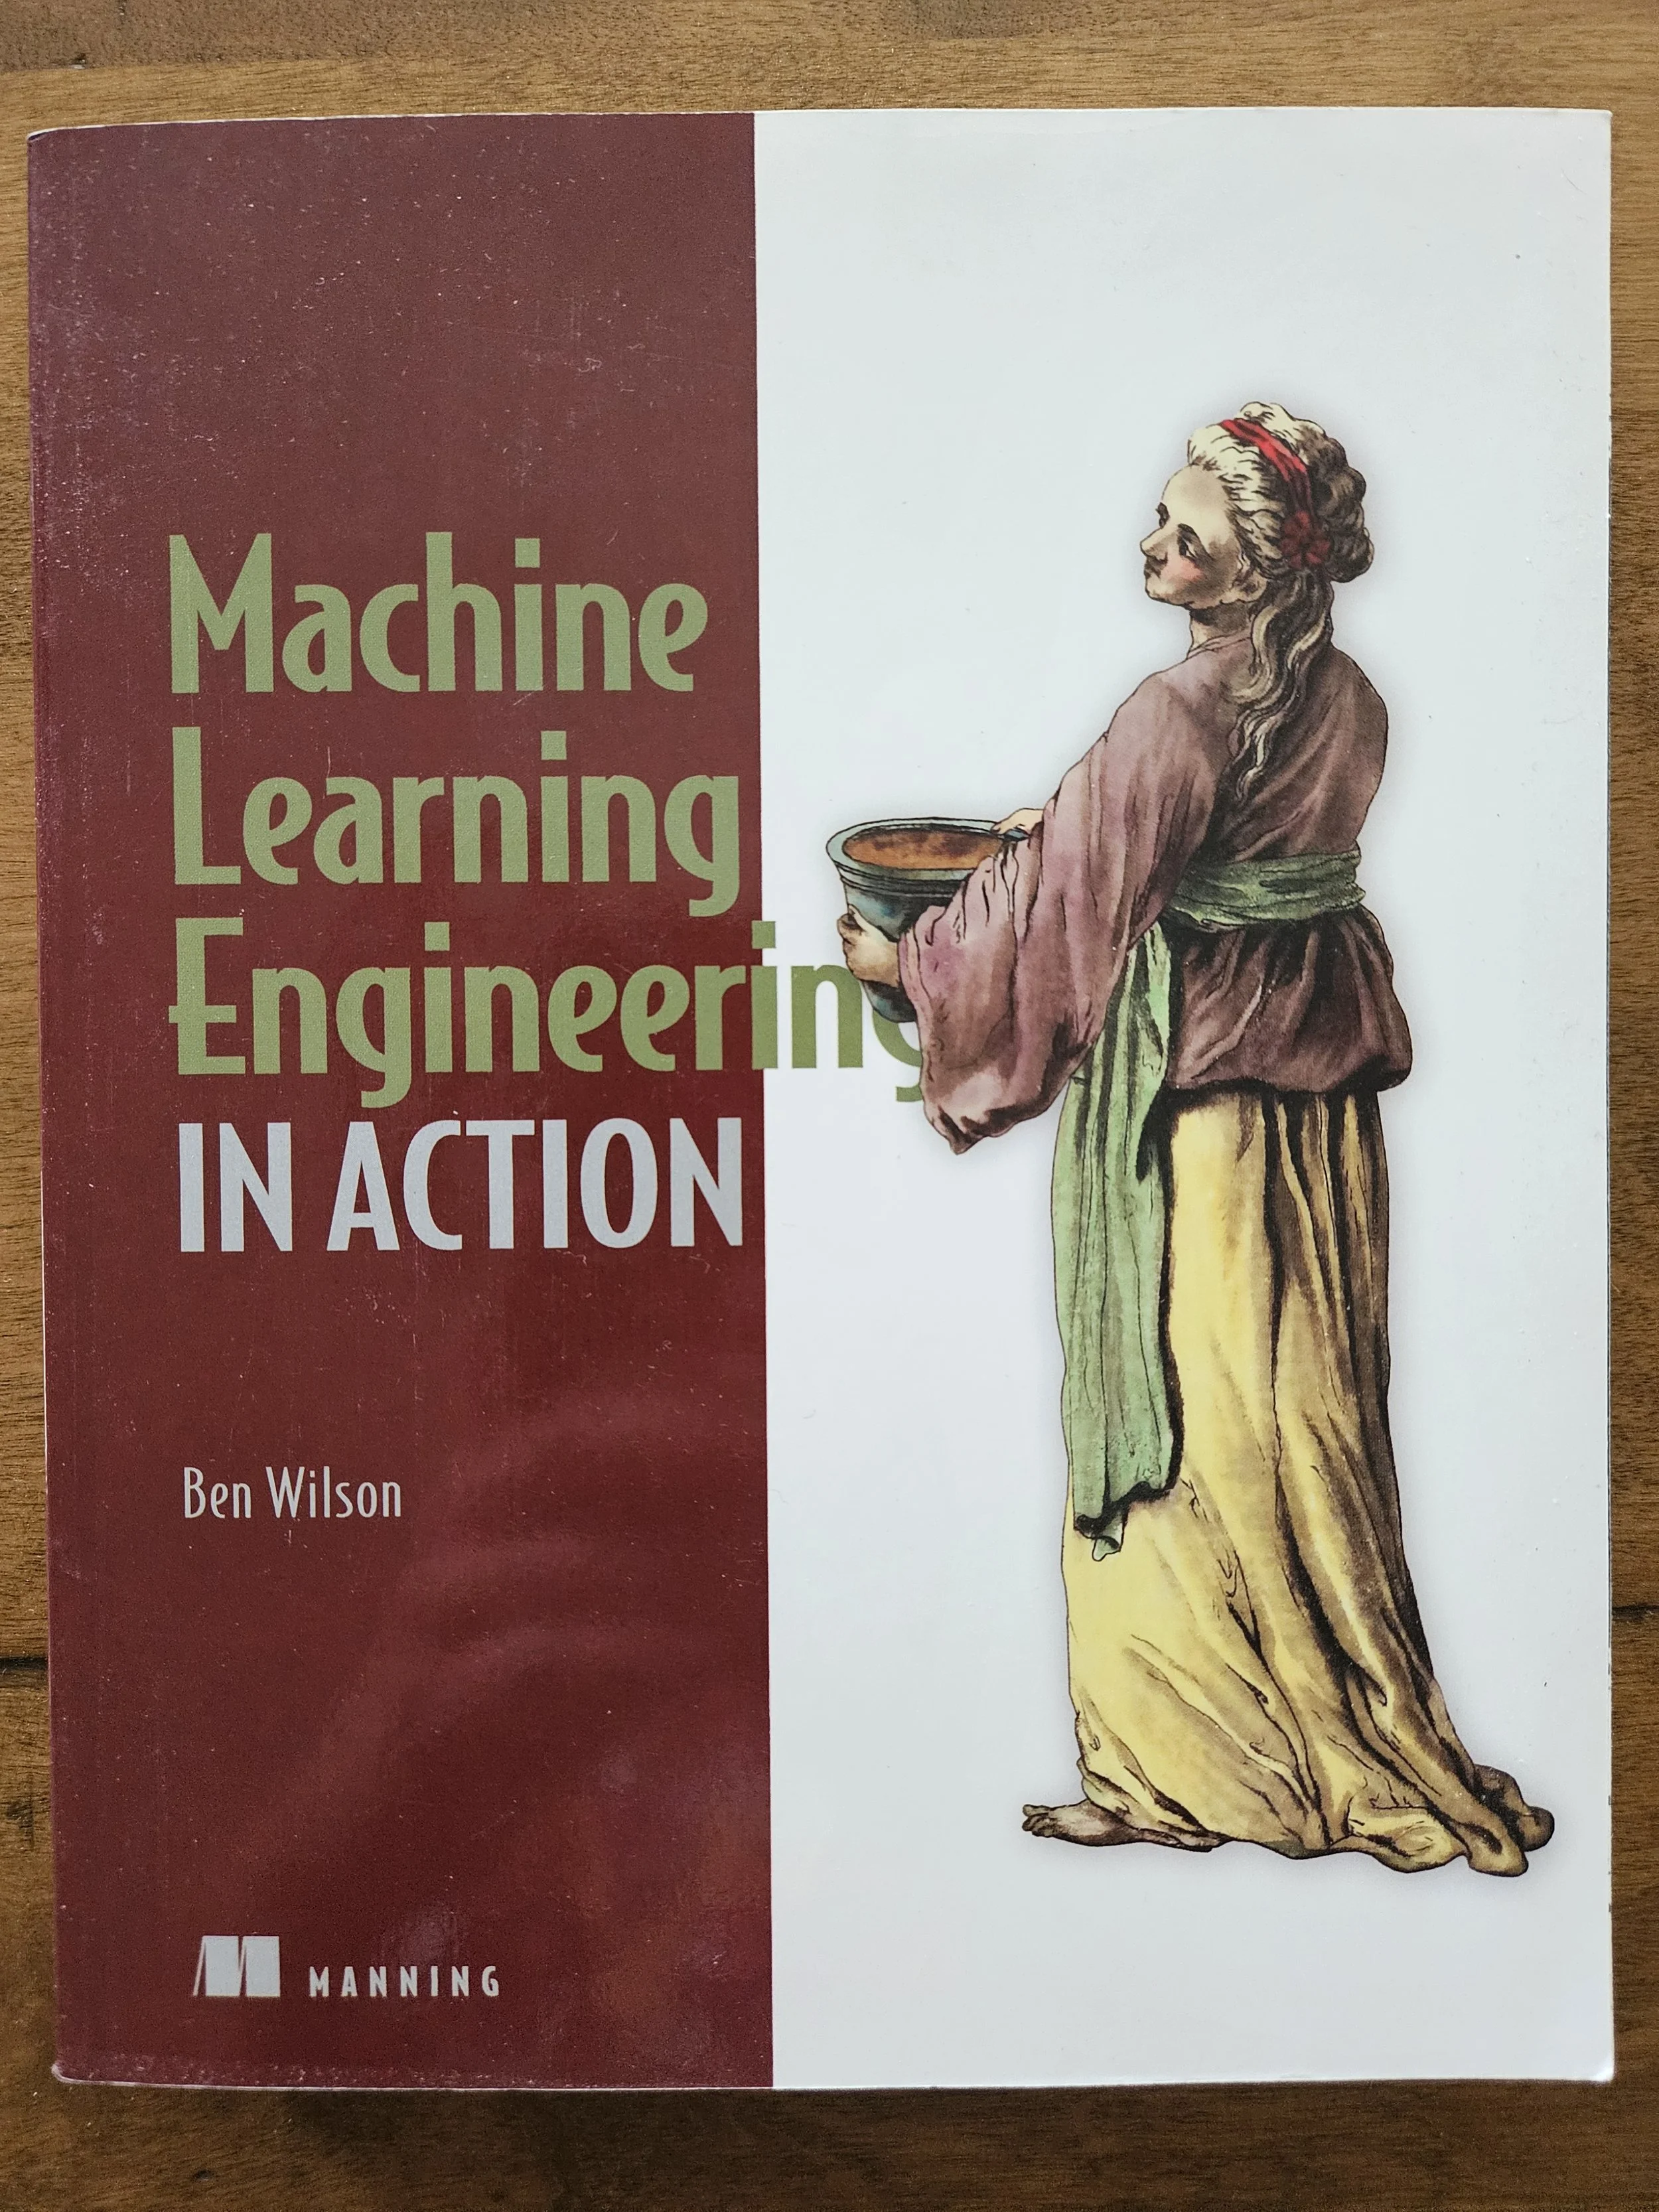
If you're interested in deploying machine learning models to production, the following book will prove useful to you:
Machine Learning Engineering is a term used to describe the collection of best practices used to deliver an ML project to production successfully. This book is a thorough introduction to the subject.
That's it for this week.
Next week's newsletter will cover the Python code for building an AdaBoost ensemble step-by-step using what you learned today.
Stay healthy and happy data sleuthing!
Dave Langer
Whenever you're ready, here are 3 ways I can help you:
1 - The future of Microsoft Excel forecasting is unleashing the power of machine learning using Python in Excel. Do you want to be part of the future? Order my book on Amazon.
2 - Are you new to data analysis? My Visual Analysis with Python online course will teach you the fundamentals you need - fast. No complex math required, and Copilot in Excel AI prompts are included!
3 - Cluster Analysis with Python: Most of the world's data is unlabeled and can't be used for predictive models. This is where my self-paced online course teaches you how to extract insights from your unlabeled data. Copilot in Excel AI prompts are included!


