
Join 1,000s of professionals who are building real-world skills for better forecasts with Microsoft Excel.
Issue #37 - Boosted Decision Trees Part 6:
AI Prompts
This Week’s Tutorial
This week's tutorial will conclude the series on boosted decision trees by demonstrating how to prompt the Copilot in Excel AI to train and test an AdaBoostClassifier model.
If you would like to follow along with today's tutorial (highly recommended), you will need to download the Adult.xlsx file from the newsletter's GitHub repository.
If you're new to this tutorial series, be sure to check out the previous tutorials here.
The prompts in this tutorial will work with other AI tools (e.g., ChatGPT) with some minor modifications.
NOTE - This tutorial demonstrates what Copilot in Excel makes possible. The prompts in this tutorial are no substitute for building machine learning skills.
I cannot be held responsible if you use these prompts at work without building your ML skills first and get fired as a result. 🤣
Prepping the Workbook
Hands-down, the best way to use Copilot in Excel is to generate Python code in your Excel workbook.
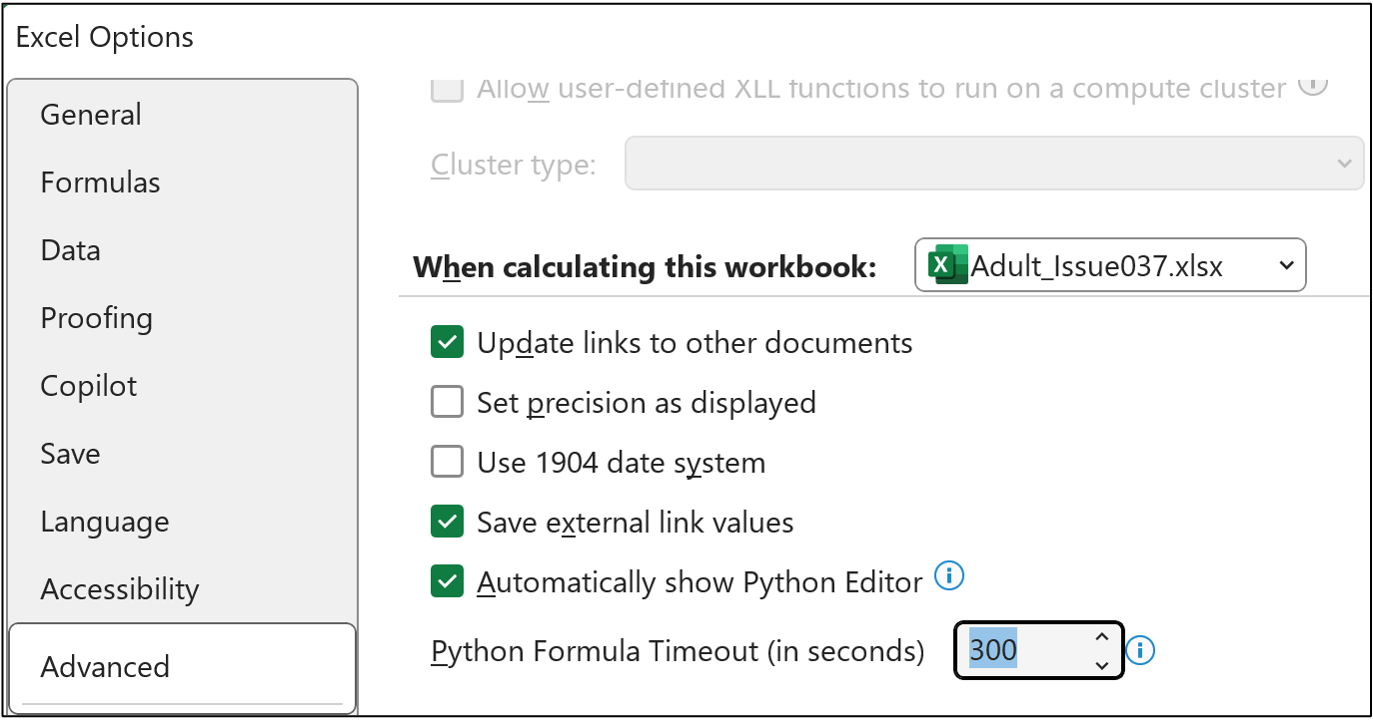
Unfortunately, Microsoft has set the timeout limit for Python in Excel to a ridiculously low value of 30 seconds. So, the first thing we need to do is up the timeout limit to 300 seconds (or more).
Within Excel, navigate to File -> Options -> Advanced:
Next, at the time of this writing, saving your Excel workbook to the Microsoft cloud is a requirement for using Copilot in Excel via the AutoSave feature:

Toggling this feature will pop up a dialog with options for where to save your file. I'll use my company OneDrive in this tutorial to demonstrate:
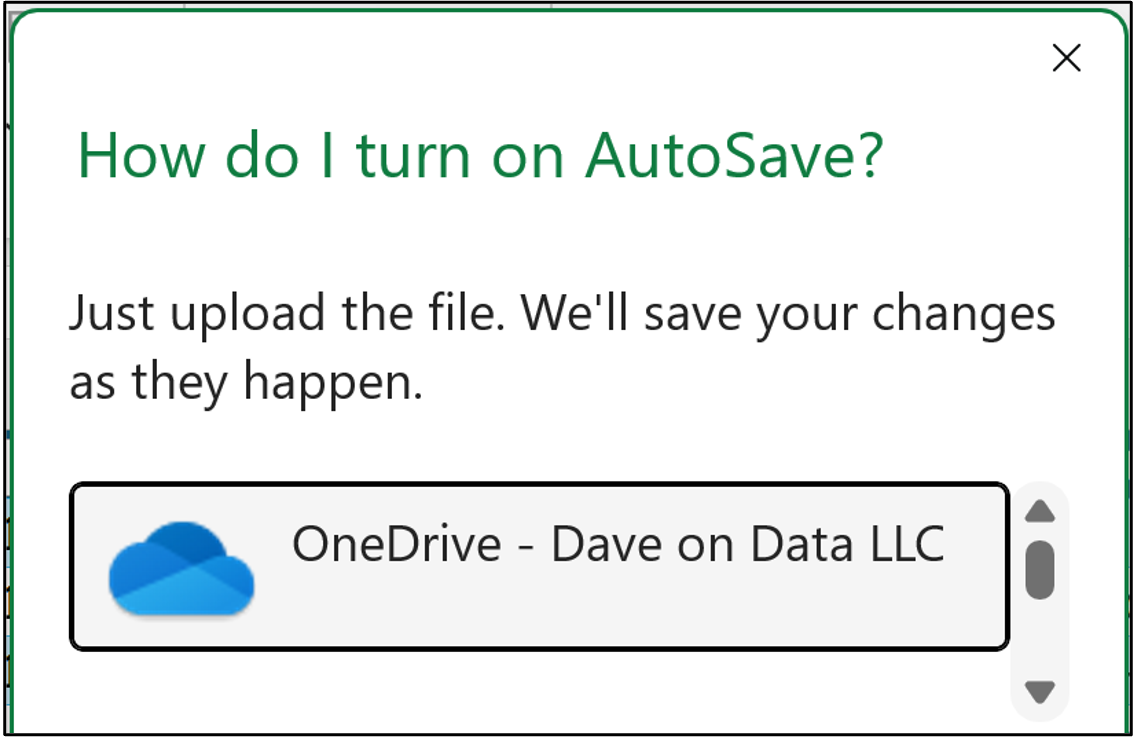
If you're using your work laptop, be sure to use the appropriate Microsoft cloud location.
Firing Up Copilot
IMHO, Copilot in Excel's "advanced analysis" mode is the biggest feature to hit Excel in decades.
In this mode, Copilot is smart and can generate Python code to analyze your data, build machine learning models, and create powerful forecasts.
The first step in partnering with Copilot is to select a cell in the AdultTrain table in the workbook, click on the Copilot icon, and then select Get Deeper Analysis Result using Python:

In response, the Copilot pane will open, and Copilot will run some initial analyses for you. Feel free to ignore these. In my experience, they are so high-level that they are not particularly useful.
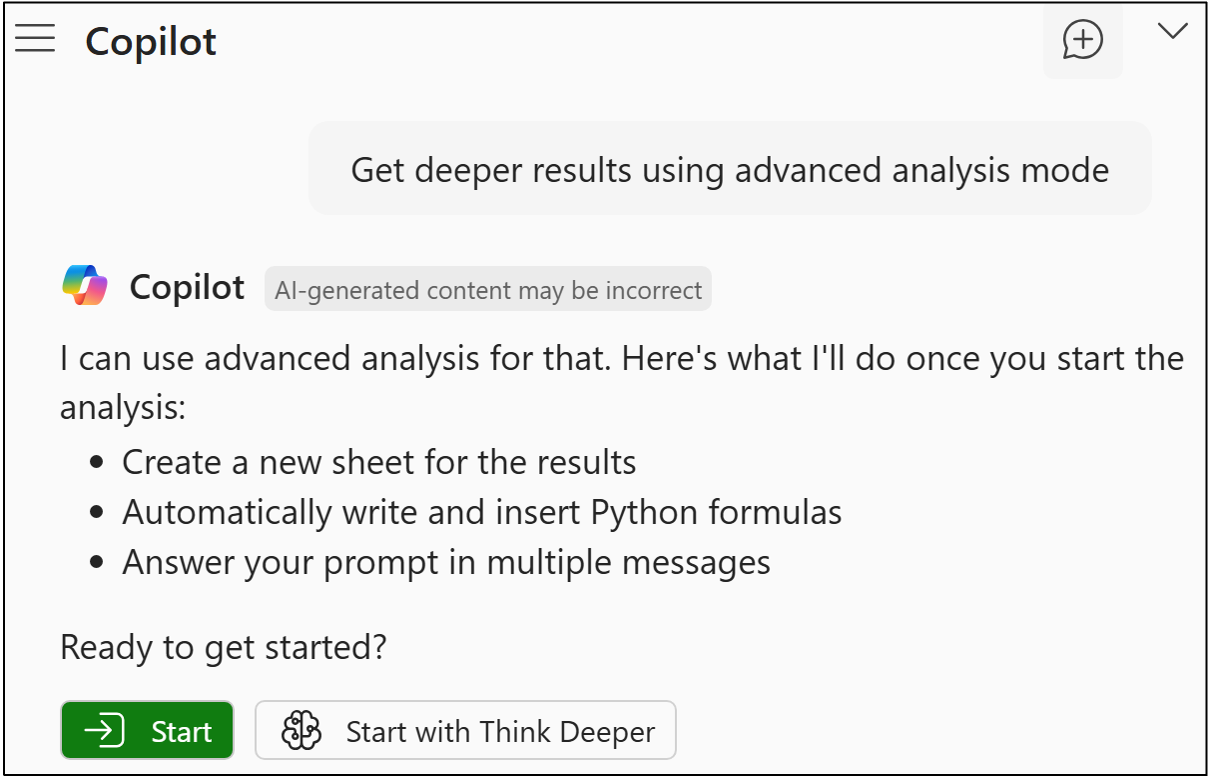
At the very bottom of the pane, you will find an option to start advanced analysis mode. Click this option:

At the time of this writing, Excel appears to be using three different AI models (i.e., LLMs):
The default (e.g., interpreting formulas).
Advanced analysis (i.e., Python in Excel).
Think deeper.
In my testing, I haven't found that I get significantly better results from using Think Deeper for my data science work. It just takes longer.
So, we will ask Copilot to start advanced analysis mode by clicking the green button:
In response, Copilot will create a new worksheet where it will place all the Python code that it generates.
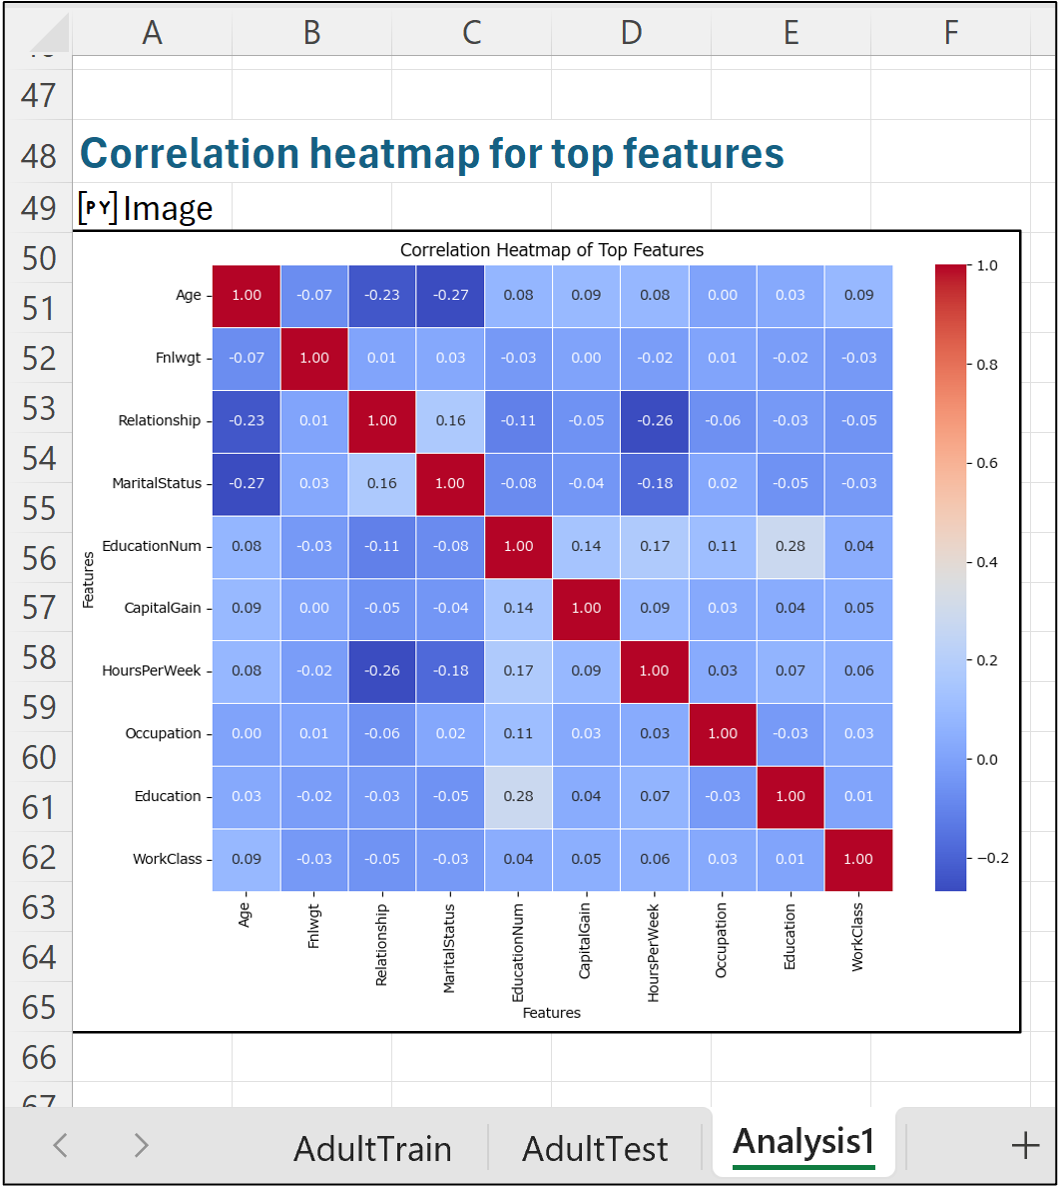
Copilot's advanced analysis mode will typically perform some initial analyses for you. Here's what it gave me:
NOTE - It's possible that you won't see the same thing as the image above. This is expected behavior from Copilot (or any AI tool, for that matter).
A certain level of randomness is simply a byproduct of the way AI tools work. As you will see in this tutorial, you will need detailed prompts to ensure consistent outputs.
The magic behind Copilot's advanced analysis mode is the Python code it generates.
Please take a look at any Copilot-generated code to make sure it accurately reflects the intent of your prompts.
You can access Excel's new Python Editor by navigating to Formulas -> Python -> Editor:


This will open the Python Editor pane:
The above image shows the first Python formula Copilot generated to load the AdultTrain table into Python in Excel as a pandas DataFrame.
Be sure to check out the rest of the code that Copilot generated. It's fun to see what the AI comes up with, and you're responsible for verifying that Copilot generated what you wanted.
Training the Model
When Copilot has finished generating its initial analyses, it will wait patiently for you to provide it with a prompt:

While you can certainly use Copilot in a back-and-forth conversational style, I find that writing my prompts in Microsoft Word allows for a more structured approach to thinking through what I want Copilot to do.
Additionally, by using Word documents, I can save my prompts and easily modify them later for new projects - very similar to how I keep a library of code for reuse.
Here's an example of the kinds of prompts I use with Copilot in Excel to accelerate my data science work:
I want to build an AdaBoostClassifier predictive model using the AdultTrain dataset to train the ensemble. Can you help me by generating the Python code to execute each of the following steps?
Please use a dedicated Python formula for each step, ensure the code is efficient, reproducible, and easily readable with good naming and comments.
Step 1 – Create a training DataFrame suitable for training an AdaBoost classifier with only the following predictive features: Age, WorkClass, EducationNum, MaritalStatus, Occupation, Relationship, Race, Sex, CapitalGain, CapitalLoss, HoursPerWeek.
Step 2 – Transform the following categorical features in the training DataFrames using one-hot encoding: WorkClass, MaritalStatus, Occupation, Relationship, Race, Sex. Please use a OneHotEncoder object to be reused with the test dataset.
Step 3 – The AdaBoostClassifier will learn to predict the Label feature of the AdultTrain dataset. The Label feature’s data is categorical, represented as strings. Please encode the Label feature as a number suitable for use with an AdaBoostClassifier using a LabelEncoder.
Step 4 – Using the final version of the training DataFrame and the numeric-encoded labels, please train an AdaBoost classifier, finding the optimal value for n_estimators using 10-fold cross-validation only. Please evaluate the following values for n_estimators: 50, 75, 100, 125, 150, 175, 200, 225, 250, 275, 300, 325, 350, 375, 400. I’ve increased the timeout for Python formulas, so this is not a problem.
Step 5 – Train an AdaBoostClassifier using the training DataFrame with the value of n_estimators found from cross-validation that resulted in the highest accuracy.
As I mentioned earlier, my experience with Copilot (and AI tools in general) is that you consistently get good results from using detailed prompts like the one above.
To use AI successfully in analytics, you must have the skills to understand the "why" of what you want to accomplish.
Without the "why," you will be just doing vibe analytics and hoping to get reliable, actionable results. This is a recipe for disaster.
Running the above prompt will take some time.
During my testing, Copilot took approximately 5 minutes on average to generate and run all the Python code. When Copilot is finished, you will see something like this:

Remember - you might not see the same output, so be sure to check the generated Python code:

Always, always, always verify Copilot's output!
Note that this applies to any AI tool, not just Copilot in Excel.
Testing the Model
Before the model can be tested, the test dataset must be prepared using the same steps that were used to prepare the training dataset. Here's the Copilot prompt:
Please execute each of the following steps like you’ve done previously (e.g., using a dedicated Python formula for each step):
Step 6 - Load the AdultTest Excel table into Python in Excel as a new DataFrame.
Step 7 – Create a new testing DataFrame using the same features as you used for the training DataFrame.
Step 8 – Reuse the OneHotEncoder to transform the test DataFrame.
Step 9 – Reuse the LabelEncoder with the test labels.
Once again, you should see Copilot output like the following, but there's no guarantee:
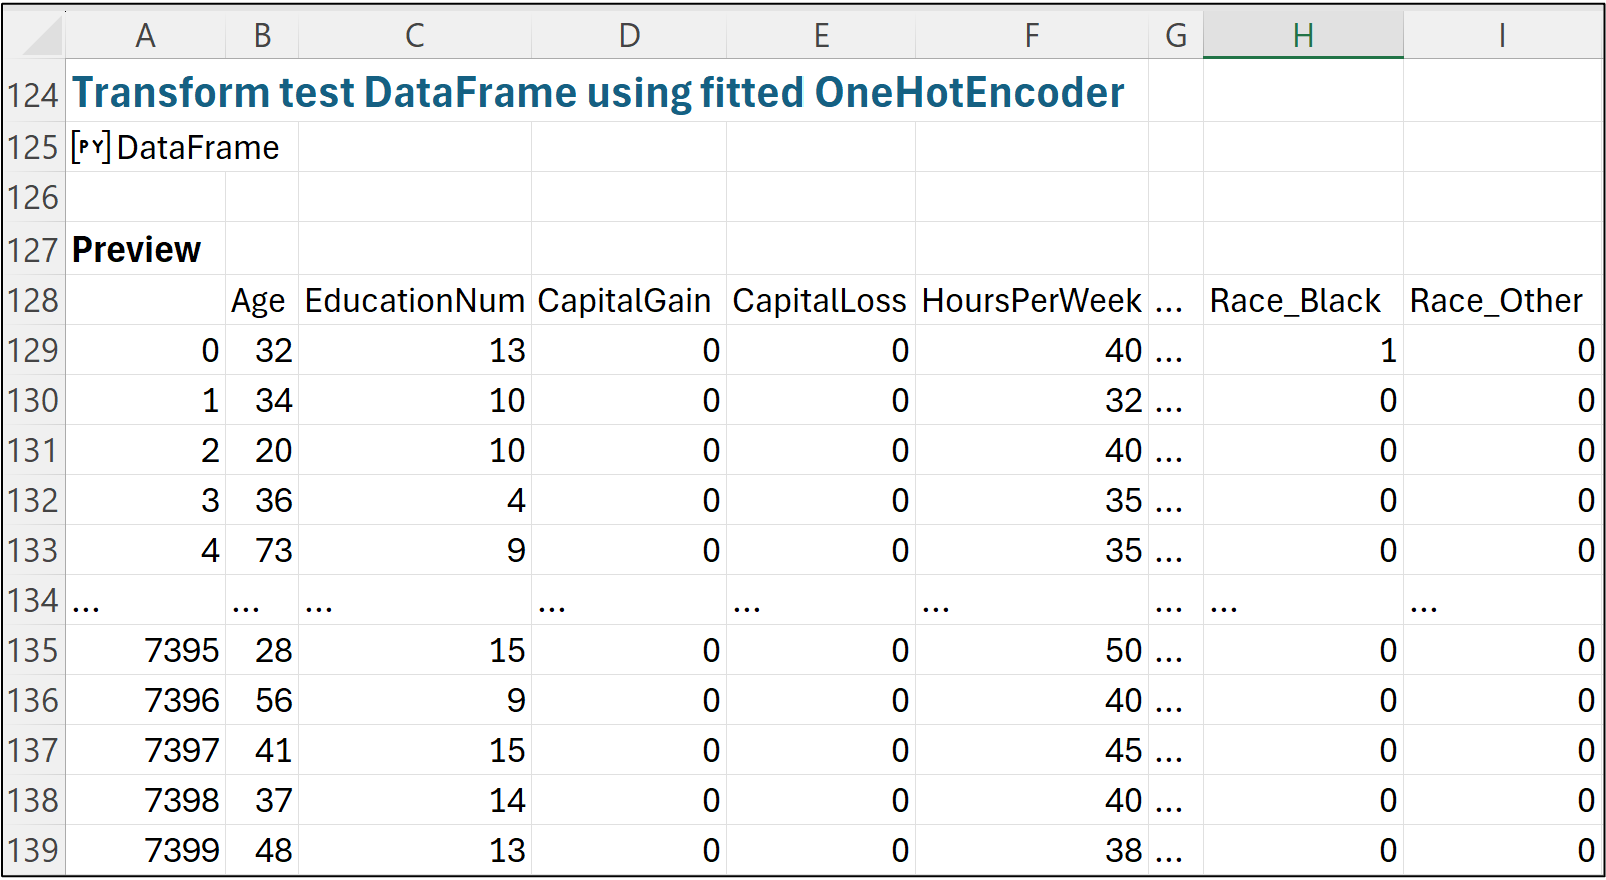
As always, verify the Copilot-generated code to be sure it's what you asked for.
Next is the final Copilot prompt for testing the model:
Please use the trained AdaBoostClassifier to make predictions for the test dataset and calculate the model’s accuracy against the test set.
You should see output something like this:
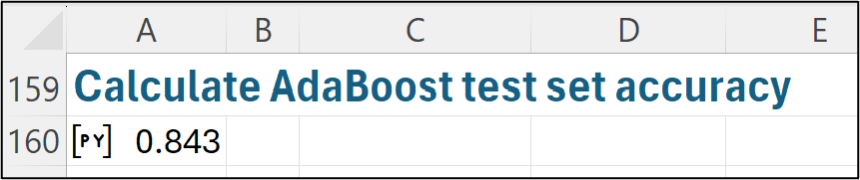
Voila!
The model's accuracy is similar to what was found via cross-validation. This is a good sign of a model that will be useful (i.e., will generalize to future data).
The more I explore the use cases, the more I'm convinced that Microsoft is positioning Excel as the premier tool for DIY data science.
For those professionals who invest in the right skills (e.g., Python and machine learning), they will be able to partner deeply with Copilot in Excel and unleash the power of their data.
This Week’s Book
When I teach teams how to use machine learning, I teach them how to use visualizations to assess the quality of their data for building effective ML models. This is my favorite book on visually analyzing data:

To my knowledge, there isn't an electronic version of this book and that's a good thing. Simply put, you want the physical copy to fully appreciate what it teaches.
That's it for this week.
Next week's newsletter will launch a new tutorial series, focusing on how to make better forecasts using Microsoft Excel.
Stay healthy and happy data sleuthing!

Dave Langer
Whenever you're ready, here are 3 ways I can help you:
1 - The future of Microsoft Excel forecasting is unleashing the power of machine learning using Python in Excel. Do you want to be part of the future? Order my book on Amazon.
2 - Are you new to data analysis? My Visual Analysis with Python online course will teach you the fundamentals you need - fast. No complex math required, and Copilot in Excel AI prompts are included!
3 - Cluster Analysis with Python: Most of the world's data is unlabeled and can't be used for predictive models. This is where my self-paced online course teaches you how to extract insights from your unlabeled data. Copilot in Excel AI prompts are included!